Power Air Fryer Oven Beef Jerky Recipe:

This is a recipe for making beef jerky with Power air fryer oven. Once you for the instructions strictly, it is very easy to prepare.
There are several versions of the recipe, but we’re about to give you the most common version. We’ll advise you to stick with for now. When you eventually get the hang of it, you can begin to experiment with it. In fact, you can create your own version.
Beef Jerky is considered to some form of in-between-meals snacks. It is crunchy, and it takes so nice. Your guest will keep asking for more. One reason why we love beef jerky is that it is not made with any chemicals and preservatives. Also, it is packed with a lot of protein. Each ounce of beef jerky contains about 9.41g of protein.
We don’t need to remind you that everybody needs protein to grow. In addition, the snack contains zinc and iron. This couple of minerals helps to boost the immune system, facilitate the healing of wounds, and also boost the production of red blood cells.
These are the reasons why beef jerky is as popular as it is. So, let’s get to the nitty-gritty of the recipe, starting with the necessary ingredients.
Ingredients
To prepare beef jerky, you’ll need the following ingredients:
- ½ teaspoon of ground pepper
- ½ teaspoon of smoked paprika
- ¼ cup of Worcestershire sauce
- 1 teaspoon of red cayenne pepper
- 1 teaspoon of garlic powder
- 1 teaspoon of onion powder
- 1 tablespoon of chili pepper sauce
- 1 tablespoon of liquid smoke
- ½ cup of soy sauce
- ½ cup of brown sugar
- 1 pound of beef
Instructions – How to Make Beef Jerky in Power Air Fryer Oven?
First step: Cut the beef into thin slices. Each slice should be about a ¼ inch thick. Now cut each slice into small strips of beef. That will be the size of your beef jerky. Remember to trim off any piece of fat on the beef. This helps to prevent rancidity.
Second step: Pour all the ingredients together in a small bowl, excluding the strips of beef. Add a ¼ cup of water to the mixture and stir it until it is evenly mixed.
Third step: Put the strips of beef into the mixture one after the other. Ensure every piece of beef soaks well in the marinade.
Fourth step: Cover the bowl and refrigerate for 18 hours. This will allow the sauce to penetrate the fiber of the beef.
Fifth step: Bring it out after 18 hours and pat each strip dry with a paper towel. You need to remove the moisture from the body.
Sixth step: Preheat the air fryer oven to about 180 degrees F.
Seventh step: Now arrange the strips on three different oven fry baskets. Try and space them as much as possible. Then put the baskets in the oven. Decrease the temperature to 160 degrees F and set the timer to 6 hours.
Eighth step: After 2 hours, bring out the beef jerky to check its doneness. Rearrange the baskets of jerky into the oven. The topmost basket will come to the middle. The middle basket will go to the bottom, and the bottommost basket will go to the very top.
Ninth step: Check its doneness after an additional 90 minutes. Bring the fry baskets out and rearrange them back into the oven again. The top basket will go to the middle. The mid one will go to the bottom, and the bottom basket will come to the top.
Tenth step: After an additional 2 ½ hours, the jerky should be done. You can bring it out then. Try to cut it in half, and you’ll see how strong and stretchy it can be. You can have a taste. You’ll see how tasty it is.
Points to Note:
Some people may suggest that you leave the beef in the refrigerator for 24 hours instead of 18 hours, it is okay. What really matters is to leave the beef in the marinade long enough for the sauce to infiltrate into the core of the beef. That’s when you can get the real taste of the sauce in the beef.
While arranging the strips of beef on the fry baskets, you should space it. This will allow every piece to get an adequate amount of heat. It may not take up to 6 hours before your beef jerky gets done. That’s why you should check its doneness periodically.
Heat makes fats turn rancid, so you must take the time to cut off every piece of fat from the beef. In addition, apart from using the air fryer oven, there are several other methods to heat your beef jerky. In fact, some people prefer to skewer the beef. Finally, follow the directions strictly and you’ll never get it wrong.
Ninja Air Fryer Beef Jerky Recipe:
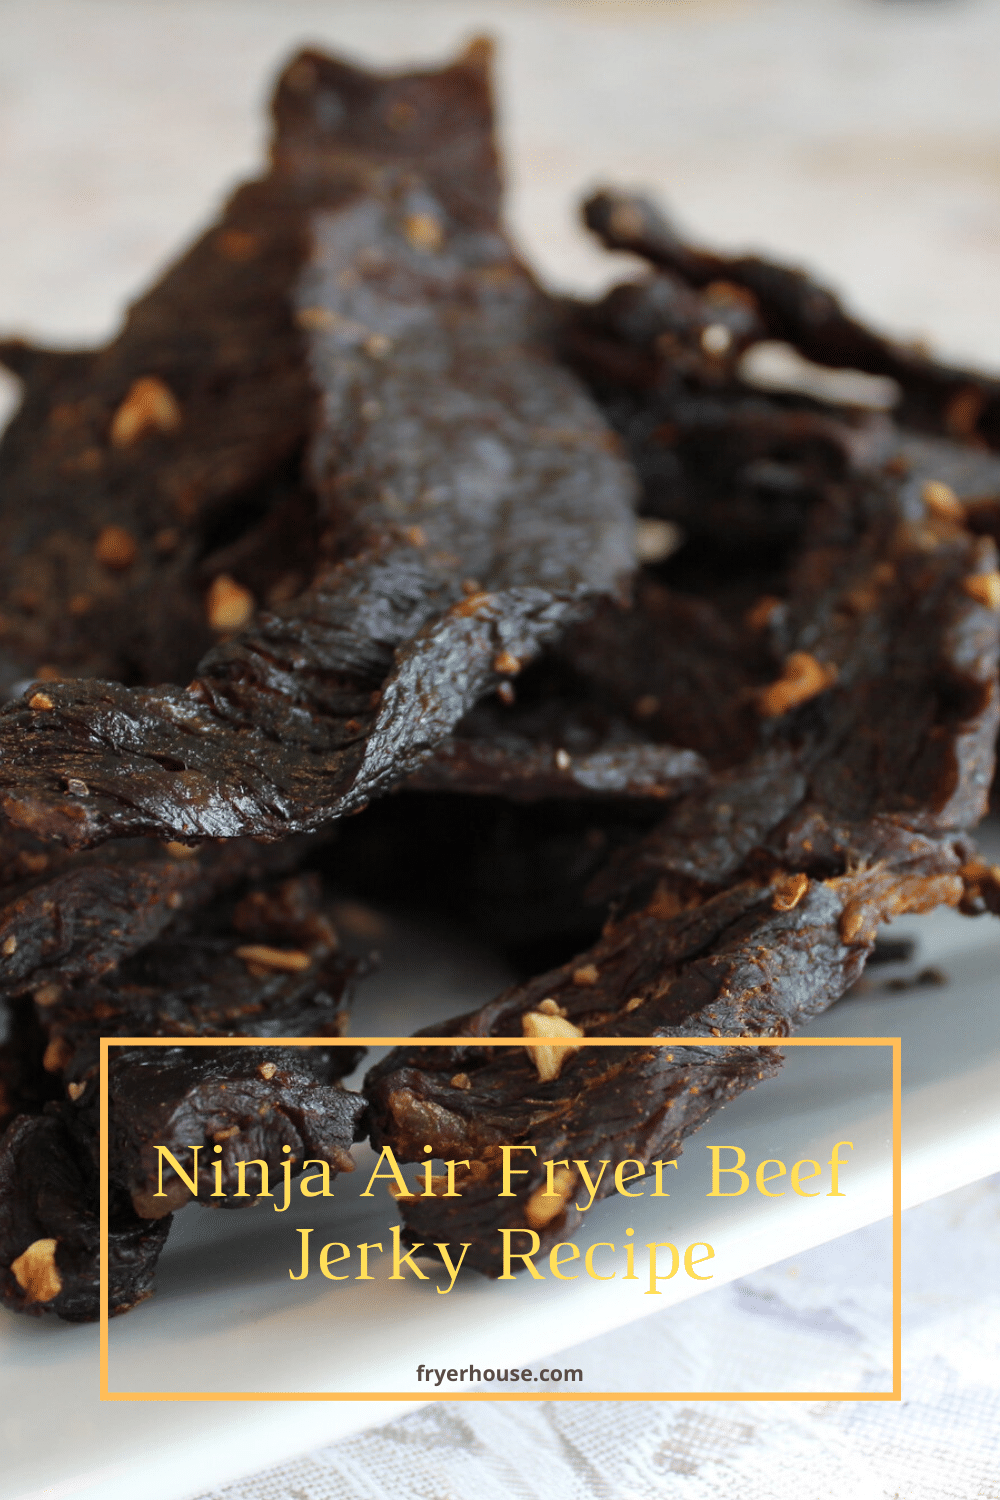
This recipe is virtually the same as the one above. The only difference is the cooking equipment being used. A power air fryer oven was used above, but now we are going to use a Ninja Air fryer. Both of them are great kitchen appliances.
Also, the ingredients and recipe are virtually the same. In this one, we won’t need to check for the doneness of the beef jerky periodically as we did when using a Power air fryer oven.
One thing we noticed after preparing the snack is that there’s virtually no difference between the one baked with Power air fryer and the one fried with Ninja air fryer. They both turned out the same. They both have the same taste, same texture, and same feel.
Ingredients
The ingredients remain the same, but we’ll still repeat them here.
- ½ teaspoon of ground pepper.
- ½ teaspoon of smoked paprika.
- 1 teaspoon of red cayenne pepper.
- 1 teaspoon of garlic powder.
- 1 teaspoon of onion powder.
- 1 tablespoon of chili pepper sauce.
- ¼ cup of Worcestershire sauce.
- 1 tablespoon of liquid smoke.
- ½ cup of soy sauce.
- ½ cup of brown sugar.
- 1 pound of beef.
Instructions – How to Make Beef Jerky in Ninja Air Fryer
Step 1: As you did above, slice the beef into ¼ – inch slices. After that, you should cut the slices into smaller strips. Don’t forget to cut off the fats to prevent rancidity.
Step 2: Mix all the ingredients together and add a ¼ cup of water. Whisk the mixture until it mixes evenly and pour it in a re-sealable plastic bag.
Step 3: Add the strips of beef into it the bag one after the other. Seal the bag and shake the bag to ensure that the strips of beef are even coated.
Step 4: Put the marinade into the refrigerator and leave it for at least 8 hours. It is better to leave it overnight.
Step 5: Bring out the pieces of beef and pat each of them dry. You can then arrange them on 3 to 4 fry baskets.
Step 6: Arrange the baskets into the fryer. Close the fryer. Set the heat to 150 degrees F and set the timer to 6 hours. That’s all. By the tie you come back after 6 hours, your beef jerky will be ready.
In conclusion, you can choose any of the two methods. You will always arrive at the same result as long as you follow the instructions to the letter.
Even if you want to experiment by modifying the ingredients, we will advise you to get it right first. Then, you can start with your own versions. Also, whenever you are carrying out any culinary experiment, you should reduce the quantity of the ingredients. So, if it turns out uneatable, you won’t waste too many ingredients. Happy Cooking!
Check Air Fryer Potato Wedges Recipe

- 12 Best Rated Air Fryers for Home Cooking in 2026 - April 22, 2026
- 12 Best Air Fryers to Buy for Home Use in 2026 - April 22, 2026
- 11 Best Air Fryer Buying Guides for Beginners in 2026 - April 22, 2026