To keep your apartments tidy, you may have to keep things that are not so useful outside the house. You may not want to discard them because they may still be useful one day. So, the best place to put them is in an outdoor storage shed.
If you have garden or barbecue grilling accessories, you’ll also want to keep the grilling or garden tools in the shed. Also, our lawnmower is meant to be in your storage shed.
Recently, people have had to convert their shed into a doghouse or partition it for the purpose. The point here is that storage sheds are becoming increasingly important. And every home needs a shed.
For one reason or the other, you may want to move your shed from one location to the other. That’s why people are now shifting from a stationary shed to a mobile one. If you already have a stationary shed, you don’t need to buy a mobile one, instead, you can attach wheels to your shed to make it mobile.
You just need to attach a pair of wheels to the shed and a truck can move it around. You don’t know how to attach wheels to a storage shed? No worries. We’ve got you covered. Find the steps right below.
How To Attach Wheels To A Storage Shed?
Step 1 – You need to estimate the total weight the tires will bear. To do that, get the individual weight of all the items you intend to keep in the proposed mobile shed. Add the weights together. After that, get the weight of the empty shed. Add it to the total weight.
Step 2 – Now that you know the total weight, find a pair of tires that are strong enough for the weight. Choose such tires.
Step 3 – Empty the storage shed. It is easier to raise it on wheels when it is empty.
Step 4 – Attach wooden braces on the outside of the walls of the shed.
Step 5 – Build a wheeled frame around the pair of the tires. You must take the measurements of the base of the shed. Remember, the shed will sit inside the wheeled frame.
Step 6 – You need to move the wheeled frame closer to the shed.
Step 7 – Dig the ground around the shed to give room for you and other people to carry it. You can’t possibly lift the shed alone. You either hire heavy machinery to lift it or get a few people to help you carry the shed onto the wheeled frame.
Step 8 – After setting the shed on the wheeled frame, you need to check around to be sure that it is sitting affably on the frame.
Step 9 – Fix the carriage hook on the wheeled frame. This is what will be connected to trucks anytime you want to move it.
That’s it.
Precautions
If you don’t get the total weight of the shed and its content, you may end up using tires that can’t bear the weight. After a few days, the tire will collapse under the weight.
You must also take the measurements of the shed before building a wheeled frame for it. If not, your frame may not be big enough to contain the shed.
Can You Put a Shed on Wheels?
Yes, you can. We understand that you need an external shed for some of your items that you don’t need often. Besides, some items need to be kept outside because they function outside. Your lawnmower and bicycles need to be kept in an outdoor shed. This will help to declutter your apartment.
Sometimes, you may want to change the location of your shed for some reasons. For instance, you may want to place a generator where your shed is. In that situation, you’ll have to move your shed. The easiest way to move your shed is to put it on wheels.
Step 1 – Empty the shed. It is easier to move it while empty. This will reduce the weight of the shed.
Step 2 – You need to attach wooden braces to the exterior walls of the shed. Attach the braces to the studs. If it has windows and doors, put the braces on the doors and windows too.
Step 3 – To access the corners and bottom of the shed, dig around the base with a shovel. Now, you can put a jack on each of the corners. Before you do that, ensure the ground is flat.
Step 4 – Wind the jack up to lift the shed off the ground.
Step 5 – Place either solid pipes or longboards under the shed. Run straps around the shed. Then, wrap the straps around the pipes or boards. Connect both sides of the shed to the top with a strap.
Step 6 – Now, it’s time to lift the crane up with a backhoe or a crane by lifting the top bracing strap.
Step 7 – Place it on the weight-bearing wheels or trailer. You have to do this slowly to avoid the shed from landing with a big impact.
Step 8 – now, you can fasten the shed on the wheels to prevent it from dangling while being moved.
Is it cheaper to buy or build your own shed?
The answer to this question depends on your expertise. If you’re a professional in the building of sheds, it might be cheaper to build one for yourself. But if you’re not up to the task, it might be a better idea to buy a built shed or order a custom-made one. In our opinion, buying an expensive but durable shed is cheaper than building a low-quality shed that may go down in a few months.
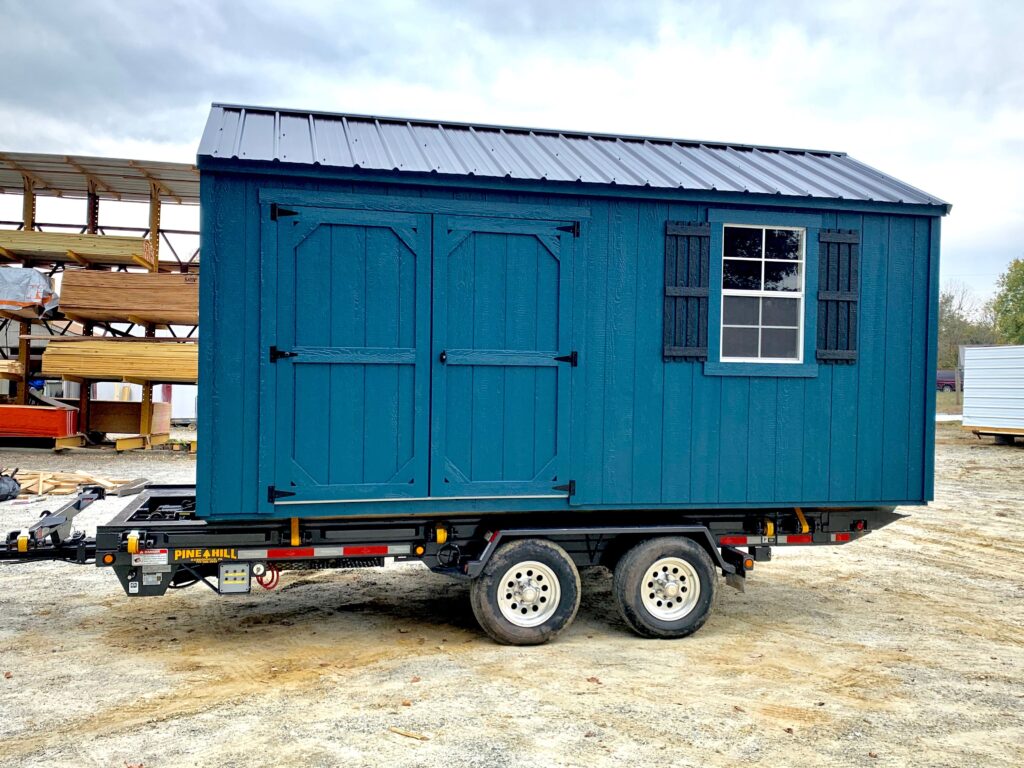
Can I put a shed on a trailer?
Sure, you can put a shed on a trailer to help you move it from one location to another. A crane can easily lift it and place it on a trailer. In fact, if the distance is long, you’re better off moving it with a trailer. You need to wrap straps around the shed. The crane will lift the shed up with the strap and place it on the trailer.
How do you move a 12×20 shed?
This is a small shed, and you can easily move it with rollers or pipes. Dig under the shed and lift it up to place the rollers under the shed. Set the rollers to create some space between them. Place the shed on the rollers and push the shed. You may need extra hands to push it. As you push it forward, you’ll keep removing the last roller and putting it under the shed in front of the other rollers.
Final Word
It is as simple as that. You don’t need to ditch your immobile storage shed to buy a mobile one. That will be a waste of money. Instead, convert your stationary shed into a mobile one by following the steps listed above.

- 12 Best Rated Air Fryers for Home Cooking in 2026 - April 22, 2026
- 12 Best Air Fryers to Buy for Home Use in 2026 - April 22, 2026
- 11 Best Air Fryer Buying Guides for Beginners in 2026 - April 22, 2026